Instructions for Windows 7 / 8 / 10 / Vista
A detailed and accurate description of 802.1X configuration for MS Windows 7 See the instructions on Microsoft pages.
Self-installation package
For automatic configuration of your computer, download the setting program from cat.eduroam.org. Simply run this file to make the necessary settings on your computer.
Manual
If automatic installation fails, you can follow these instructions to make the entire configuration manually. According to the instructions, you can also check the settings in case of trouble.
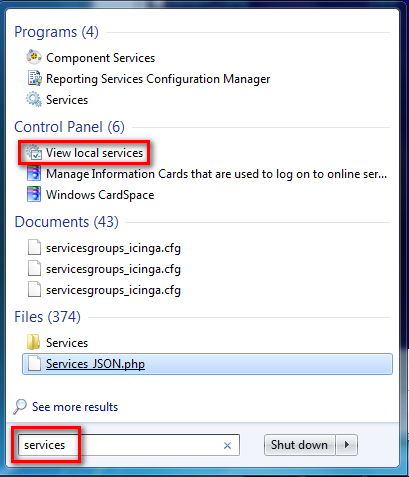
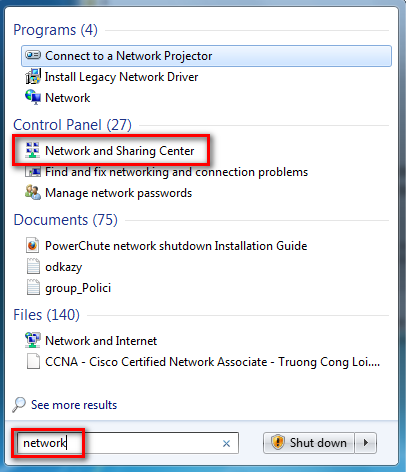
Start by letting search Services or Services.msc (this option is a universal for all language OS).
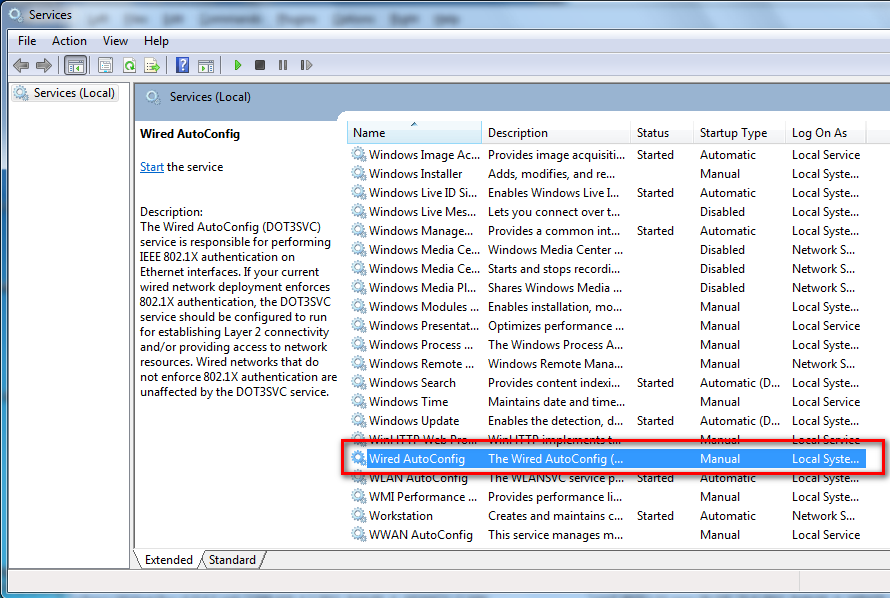
A list of services that are running or can run on your computer will be opened in a new window. Locate the Wired Autoconf Service . Check the status of this service.
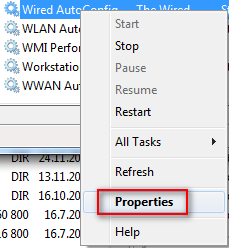
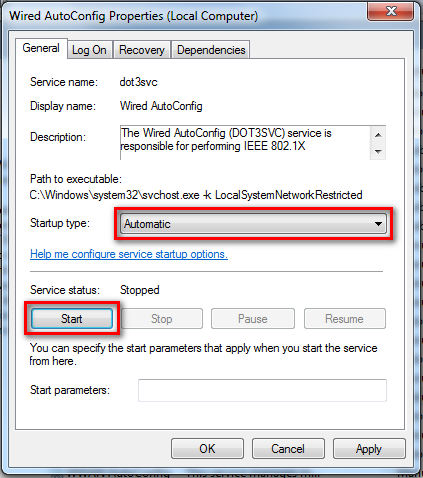
If state of this service is not “Running” and startup type “Automatic”, open the context menu by right-clicking on it and select the “Properties”.
Startup Type change to Automatic and start the service.
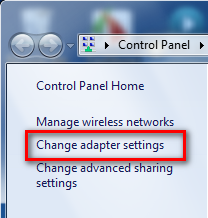
From the Start press the right mouse button and select “Properties”
In the opened window, select “Change Settings”.
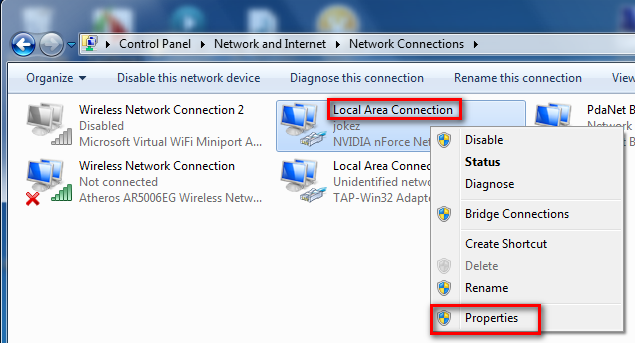
From the list of network interface, select “ Local Area Connection ”. If you are unsure about which interface is right, you can help by the time you disconnect the power cord - the right interface should appear cross (cable disconnected). Using the context menu by pressing the right mouse button to open the “Properties” this interface.
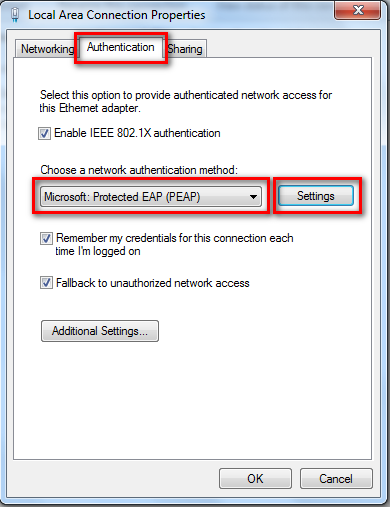
Go to the Authentication tab. If this card is not displayed, go to the list of possible causes here. Turn here Allow authentication IEEE 802.1X and as an authentication method, select Microsoft: PEAP . Press Setup next to the authentication method.
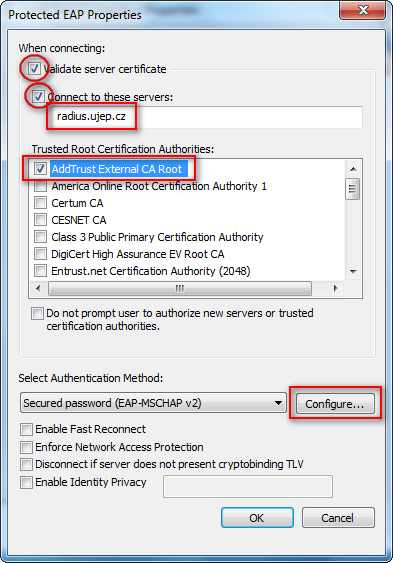
For better security, we recommend to fill in here as an authentication server address radius.ujep.cz and as a trusted root certification authority to enable the authority: AddTrust External CA Root (certificate installation is described here). Turn off the Allow fast recovery connection. Next, press the Configure button.
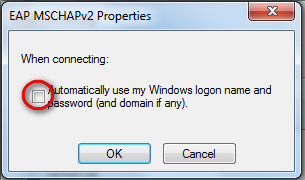
Uncheck the option Automatically use my username and password …..
When the computer is now connected to network, jumps in the lower right corner of the screen warning that you must enter authentication information:
Click on them and pop up dialog to enter your user name and password. As a user name Enter your phone number student. The motto here is your password for eduroam. Everything about this password, please ADD A LINK Fields Domain leave blank.
After their successful entry will open a full-fledged communication.
Saving names and passwords
IEEE 802.1X supplicant in Windows 7 / Vista can save the user name and password and the next is automatically used. This is obviously very comfortable, simply start the computer next time, do not care about anything and you are automatically connected to the network. But it has two disadvantages: If you do not log on to your computer is password protected, your name will be authenticated by anyone who turns on him. If you have done any iniquity in the network, you will be sniffing you. The second problem concerns the change password - if you change your password, supplicant will continue to provide old and do not connect.
Whether you want or do not want to save your username and password can be set in the properties of a network interface card specifically for the Verification (its opening is described above). Here switch Remember that connection credentials for each login .
